Saturday, June 26, 2010

Tomato Update

As I posted earlier this month, I wanted to try an experiment in growing bigger and better tomato plants, with a HUGE yield. I have yet to know if I am going to get a HUGE yield, but the plants are really growing. I wanted to show pictures, but I also want to disclose as much as possible.

The tomato plant I'm profiling in this experiment is a San Marzano variety (I'm profiling this tomato plant because I have pictures documenting the plant from the beginning). It's supposed to be a very good Italian plum tomato, its taste and meaty flesh. It's believed the volcanic soil, from Mount Vesuivus is what makes San Marzano tomatoes , "San Marzano" tomatoes. Otherwise, one would just be growing a fancy Roma tomato. You can learn more about San Marzano tomatoes at this website: http://en.wikipedia.org/wiki/San_Marzano_tomato.

I obviously don't live in Italy, and don't have volcanic soil from Mount Vesuivus, but I hope that my tomatoes will still be San Marzano tomatoes. But, getting back to the original point of this posting, I purchased San Marzano tomato seeds from an internet source earlier in the spring. These seeds are organic, but they sure seem to not be organic. I mean, when the plants first emerged, they seemed "big" and very , very healthy, even without any fertilizer. Okay, maybe that's normal and I just don't know any better.


So, after the tomato plants emerged, I began the tomato experiment on June 5th (see the June 5, 2010 posting). The picture above shows the tomato plant on June 4th.


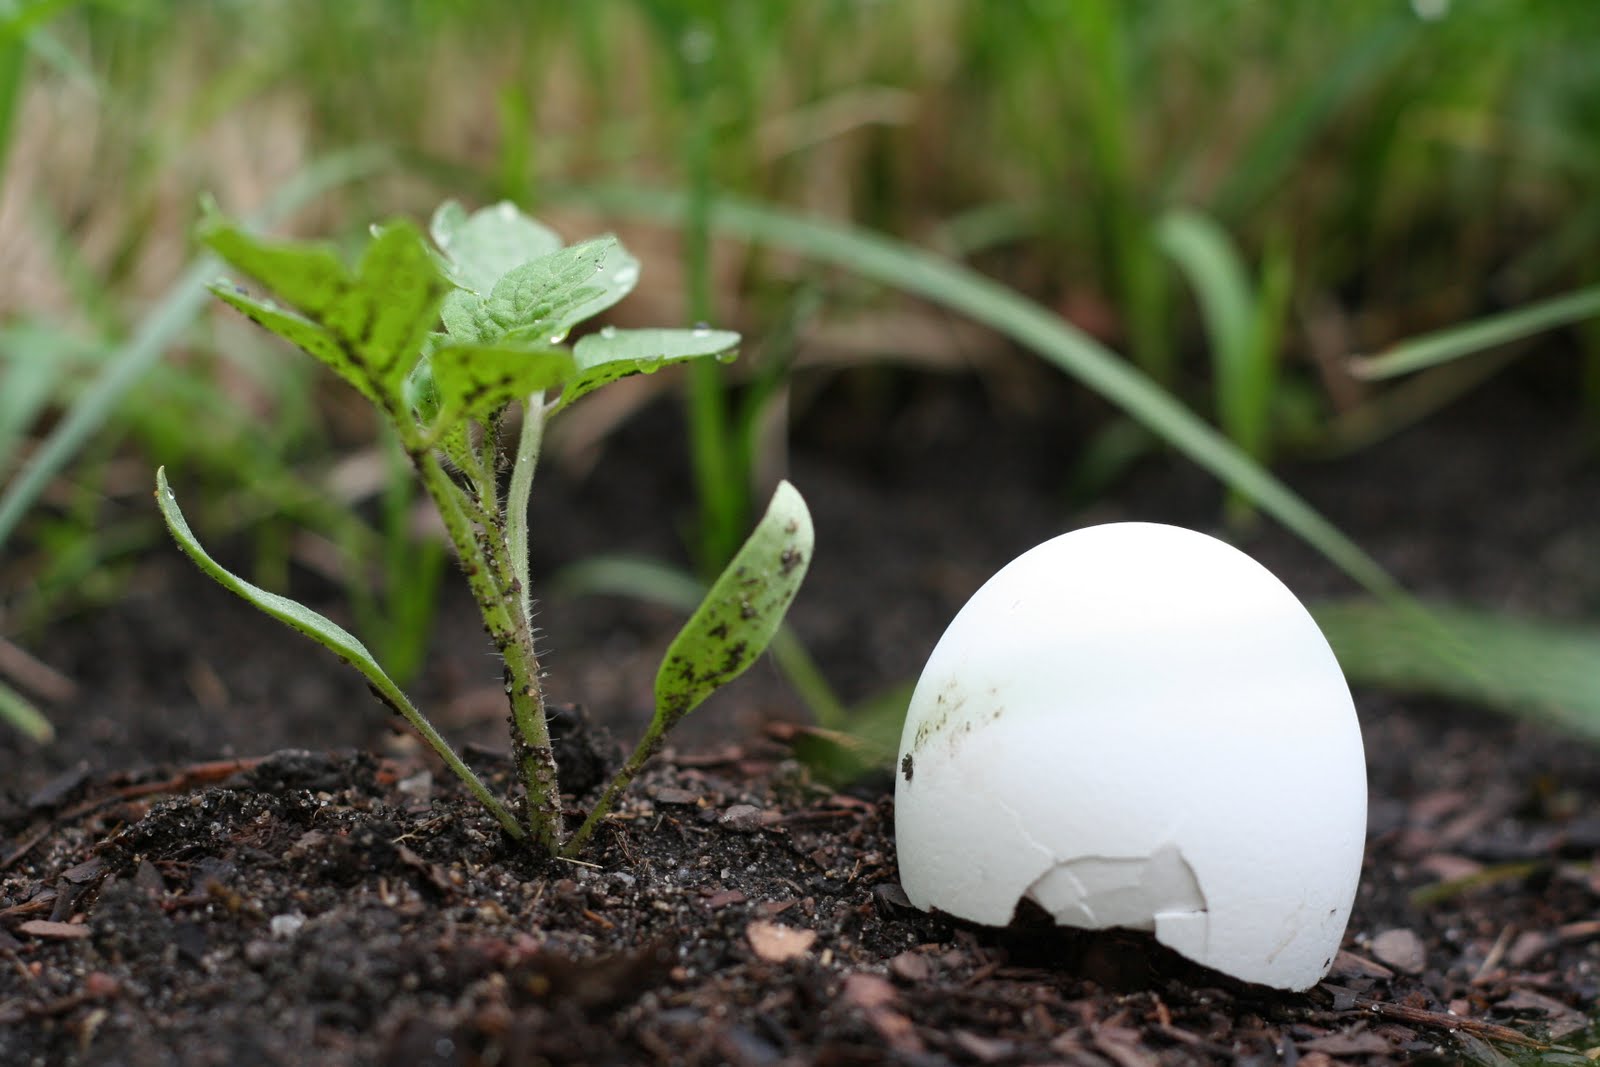
On June 11th I took another picture of my tomato plant. I put half of an eggshell next to it to give myself (and you) some point of reference. A ruler would've probably been better, but oh well.
Today, I took out a clear clipboard, containing measurements on the side, and put it next to my tomato plant. I don't exactly know how to measure the plant, but considering the height of the leaves, the plant is between 10 to 11 inches tall.


I must admit, in my memory, my tomato plants in the past have never gotten this big within such a "short" time. I don't know if it's the early warm weather, the seeds, the experiment, or all the rain, but this plant is big. Of course I will keep posting about this plant.

Friday, June 25, 2010

Wood Anemone

Wood anemone . . . . Doesn't the name of this little flowering plant conjure up images of fairies, magic dust and a cool woodland?

At my home I discovered that I have wood anemones growing at the edge of the lake, among the iris and reeds, and underneath several maple trees. The pretty little white flowers, with yellow centers, are small and delicate, perfectly contrasting against the vibrant forked leaves. Aren't wood anemones enchanting?

Wednesday, June 23, 2010

Turning Blue

Sunday, June 20, 2010

Little Red Orbs

I don't think I've ever posted a picture of my cherry tree with fruit. Aren't the the little red orbs among the leaves just lovely? I picked the tree right before I took the picture (should'have been the other way) and got about a quart of fruit, so in the picture, there isn't as much fruit on it. Compared to previous years, I've gotten a lot of fruit this year. I've already made strawberry-cherry jam (a future post about jamming will be forthcoming) with the cherries I picked this morning.


I currently have a half-pint of cherries I picked earlier in the week (if I didn't pick the cherries the birds would've gotten to it). I'll add more to it, but I'm waiting for the rest of the cherries to ripen before picking. At this point, I'm trying to decide what I'll use the cherries for. I want to make a pie or turn it into maraschino cherries. Oh the dilemma.

I also can't wait for the neighbor's sour cherry tree to ripen. Apparently, we are allowed to pick their cherry tree because they don't do anything with their cherries. I'm pretty excited. Last year was the first time I've ever picked their cherry tree and the first time I discovered that I could. Well, I'll post more once I start picking.


Wednesday, June 16, 2010

Clematis in Bloom


[Taken May 31, 2010]

Sunday, June 13, 2010

Containerized Citrus Trees

I've decided to try growing citrus trees in containers one more time. Previously, I had a lime tree and an orange tree. Unfortunately, the two did not survive this past winter while I was visiting my family in California because my beau didn't water the plants while I was gone (although, after reading an internet thread I now wonder if the plants were really dead or just really dormant). To make the long story short, I no longer have these two plants.


So earlier this month, after some prompting from my brother, I decided to try growing citrus plants in containers again. I purchased an Improved Meyer Lemon tree and a Bearss Seedless Lime tree. Today, I finally got around to repotting the two plants into bigger containers. The lemon tree already came with flowers and mini fruit (probably due to the greenhouse's perfect greenhouse environment and overfertilization), while the lime tree just needs more time to grow. I must say, the lemon flowers are very fragrant and reminds me of gardenias. Hopefully, this time around my trees will survive and have a longer life span.

Friday, June 11, 2010

Rain Barrels

I purchased two rain barrels today. Yes, they are BLUE (Smurf-like blue), and may be unsightly, but I've been wanting some rain barrels for the longest time. It's a wonderful and economical way to collect rainwater to water the garden. You can find out more about rain barrels at this website http://www.uri.edu/ce/healthylandscapes/rainbsources.html.

I've been searching on Craigslist and yesterday I finally found a seller, selling one rain barrel (able to hold 55 gallons) for $45.00 that already came with a spigot and ready for immediate use. I felt that the price was reasonable since I really was in no mood to try and outfit a 55 gallon barrel with a spigot, cut out a hole on the top and cover it with mesh (to minimize mosquitoes breeding) and an outflow spout. Seriously, I've been wanting to build/assemble my own rain barrel, but with my other major project still in progress (note: home renovations are not for the faint of heart), I just don't have enough energy as of late.

Last night would've been a great time to have a rain barrel handy (it was the first fierce thunderstorm in the city with thunder and lightning). Today has been overcast and I believe tomorrow will be overcast too. Hopefully, we'll get some more rain and hopefully fill up my rain barrels.

Wednesday, June 9, 2010

Strawberries, Yum!


[From my own garden.]

Saturday, June 5, 2010

An Experiment


I came across this posting (http://www.growbetterveggies.com/growbetterveggies/2008/05/how-i-plant-a-t.html) about two years ago and was quite intrigued. The testimonials on the the website swear that this method produces five-feet tomato plants and loads of tomatoes. So, this year, I decided that I will try out this method (or at least come close to it).

In the past, I've tried to start my tomato plants early by planting my tomato seeds in little containers indoors, but I wasn't too successful with that method. I'm a bad gardener because I sometimes I forget to water consistently and they wilt and die. So, the method I've found to be successful (at least for me), is to plant the tomato seeds in my garden and to move the plants once they have sprouted. This method works for me because the plants are exposed to a harsher environment and becomes much more hardy. Furthermore, the plant actually survives if I don't water it every day. At the same time, the moving of the plants helps me with my dilemma of wanting to keep as many of the sprouts as possible. See, I often feel bad when I have to thin out the seedlings that have grown too close (it's worked so hard to germinate and grow), so it's great if I can replant the seedling elsewhere.

This year, I decided that I would try the "everything but the kitchen sink" tomato planting method, as described in the website mentioned above. First, I had most of the stuff mentioned, but not all. I did have the fish heads (fish tails and guts are also acceptable), the aspirin, the bone meal, broken eggshells, some compost (no worm castings), and the fertilizer (although it may not be a time-release fertilizer). I felt that I had most of what was needed, so why not attempt something new, right?


Today was a cloudy overcast day, with a slight drizzle. In other words, a perfect day for transplanting plants (I really don't mind the very light rain). I always recommend that if you intend to transplant any plants into or around your garden, may it be from another part of your garden or from a pot or a start-up kit, do it early in the morning or on an overcast day. The plants are already stressed from the transplant and shouldn't be stressed any further by the sun or its heat.


I dug up the hole and threw in the fish head, aspirin, bone meal, crushed eggshells, compost and fertilizer. I then dug up the tomato plant. In the picture above, there are two tomato plants. Yes, you are seeing a paper towel/toilet paper cardboard tube. I read in a blog (sorry, don't remember which one) that you can cut up the tube into smaller pieces and place it around a plant/seed. This helps you to remember that you already planted something in the spot, to see the plant in the garden (so you don't accidentally step on it), and also may help you to identify that the plant is not a weed. So far, I found this tip to be very helpful.

Anyhow, as I was saying, I then dug up the tomato plant. Now, the method I use involves a hand trowel and digging about an inch or two away from the plant. I dig in and lift up, digging up the dirt along with the plant, trying to keep as much dirt as possible close to the plant. I believe that this helps minimize the stress on the plant and keeps as much of the plant's roots in tact.


I then put the tomato plant into the hole and fill up the hole with dirt. I also cover the stem of the tomato plant, up to the leaves, with dirt. Apparently, the little hairs on the stem will become roots. This is important because the extra roots will provide more support for the plant, ensuring a better chance for the plant to support itself as it matures. Well, I'll keep you posted as to how successful this experiment will be.